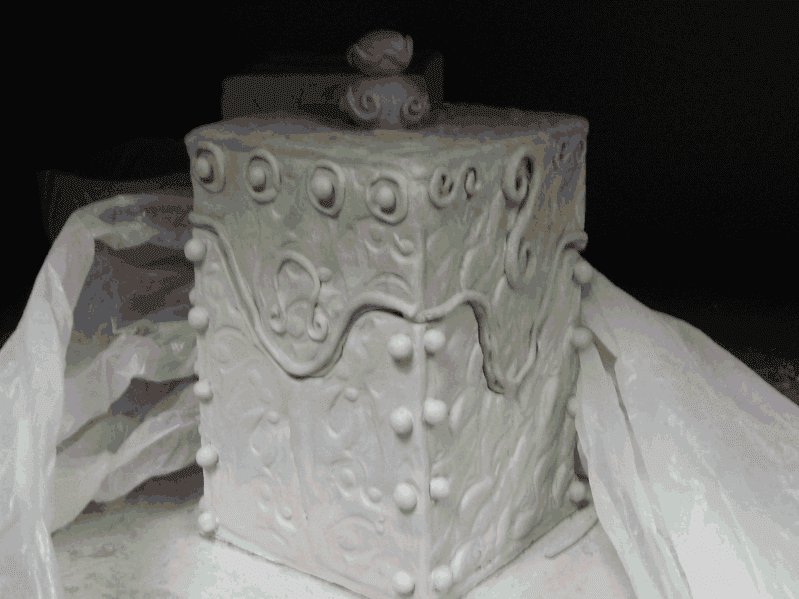
The power point was created by myself and two other amazing teachers a few years ago- hopefully you find this useful. It's funny. Kids used to hate long demos, then they loved power points, now they like demos. In my class I do a mix of both. I show the power point so they can see where we are going, but then I chunk each step and we work as a group. Last year I actually didn't really get to teach the building of this lesson. My kids had all the slabs created when my son was really sick and in the hospital. My sub was able to teach it through the power point handout. The boxes came out surprisingly good for a person with no ceramic experience teaching the lesson to high school kids right before winter break. Amazing what can happen if lessons are mapped out like this...
A few weeks before teaching this lesson I do a stamp making lesson, where the kids make stamps that will be used on their boxes. Make sure all names are read easily so you can return them after bisque firing. I tried using hot glue one year on PVC pipe, but that was a bit of a mess, and the kids put the hot glue on so heavy that it poked holes in their slabs. The years that we did bisque stamps, the designs came out a lot cleaner. The hot glue was very round and visually read fuzzy. It was a cool idea, but maybe for third year kids, not first year ceramics kids.
So here's where some kids will struggle...
- They will have large slabs and stamp directly onto the table sticking the whole slab on there... needing to restart... the kids will get discouraged from the get go. Make sure you remind them to work on canvas, wood boards, or even paper towels, whatever you have. Walk around and have the kids check each other and everyone else. This is a time it is okay to get nosy.
- As you know many do not know how to use a ruler. For high school, I joke about this and re-teach all of them how to use one and measure out templates on paper first. For my MMR or Downs syndrome kids I have cardboard templates for them to trace as they cut directly on the clay. The key is THEY are doing the cutting. Just because they have a learning disability, does not mean that they cannot learn. Some of the best boxes made have come from my extra spectacular kids. Beware of aides that will try to do it for them. When I have an aide I set up from the get go, that if the aide wants to work alongside the kids making something they may. The aide is there to coach the kids, not do it for them. For some having them work along the kids is great, it keeps their hands busy while reinforcing the concepts being learned. For others, this is not a god thing, as they forget about the kids they are supposed to be helping. Hopefully you can tell what kid of teacher/ learner your aide or assistant is. This can be a difficult balance... but once figured out you and the aide can become an awesome co-teaching team.
- Most kids are fine with letting the walls dry to leather hard and then putting them together, however then they struggle with wrapping them up the for the next day if they are partially built... they either have them dry more going to bone dry or soak them making them flop over. Be sure to stop and check everyone.
-I like the kids to have an extra rectangle and square because about 20% of the time they will have something break, hit it wrong, or let a corner out of a bag to dry- kids will have the craziest things happen.
-Undercuts and locking the box... For some reason the concept of cutting the box can be a challenge. Some kids dive right in and cut the boxes open fine... Other, are super scared to touch it, while other were not scored but cut super crazy lines that will not open. I find that making the kids have me check the boxes works well. You might even need to hide all cutting tools. I have a class this year that will need all cutting tools hidden until every line is approved.
- Once lids are cut off kids forget that they are not attached. They will turn the box over to write their name or check something and then the lid has plunged to it's death on the floor. I'm not sure why their brains work this way... but it has been a consistent trend every year.
The lesson Plan Format here is weird, and I have left off standards.... our other administrators wanted my collaborating teachers to write in this format, so threat is why you see it in "I do, You do, We do" follow the numbers. Feel free to take what you want and re-format for your own purposes.
Box Lesson Plan https://drive.google.com/file/d/0ByayVUBQWw2JQTY5RDRsTU1xNEU/edit?usp=sharing
Box Power Point- Teacher Version https://drive.google.com/file/d/0ByayVUBQWw2JbFUtcU8tN2dMLWs/edit?usp=sharing
Box Power Point- Student Version with fill in https://drive.google.com/file/d/0ByayVUBQWw2JTTVlZ01JRDRNdkk/edit?usp=sharing
Rubric https://drive.google.com/file/d/0ByayVUBQWw2JZmJOWGFMLTR4UVE/edit?usp=sharing


cant seem to access your rubric no matter what i do... help!!!
ReplyDeleteThank you so much for sharing!!!!
ReplyDeleteWow,this is amazingly helpful. Thanks so much for sharing your experience! I will start teaching art and ceramic classes for grade 5 and 6 in Germany and and I am more than grateful for and help I can get as I am not an educated teacher.
ReplyDelete